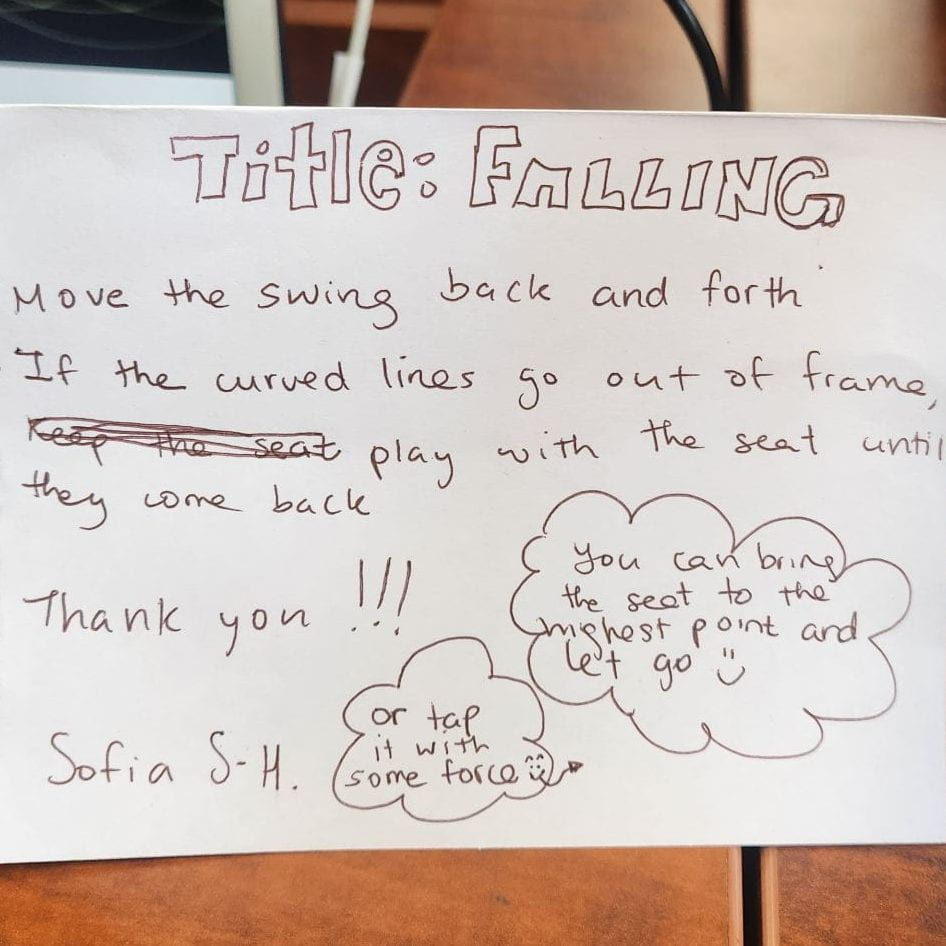
The project contained two part: she had p5.js and the swing. The swing’s movement was triggering the curved lines. The more it swings, the curved lines would go out of the frame and move faster. I thought the curved lines were thin leaves and as the swing move the leaves move due to the wind made. She explained that the project was for herself and everyone who shared swinging memory with her. I only have suggestion for the projection. I think it would have been nicer if she placed the swing in front of the computer so that it seem like a background.
Cupid’s Bow by Lanna:
The project was really cute. The game was to get a score by pointing the bow to the heart and make it bigger. The theme was obviouslt cupid and she added that it was inspired by Greek mythology. The score was already accumulated when I played it. It thus would have been better if she had a starting page and a ending page to give an evaluation for the player: lost or win. And since the player is the cupid, she could have placed 2 people around and make them meet when the heart gets bigger enough.
Les Aventures de Le poisson Steve by Emma:
The project was done by Scratch and a micro:bit. From what I know, it is her first time using these tools, but she really managed well. And the drawings are really well detailed and the fish was well made too. She mentioned that it took her a long time to make the fish. The movement of the fish that contains micro:bit triggers to change the drawing of different variants. There were about 3 variant of a character that is from that cartoon, but I haven’t watched it so I couldn’t sympathize with it… I think the emotion conveying was to think back to the childhood and meet Steve again. If she had few words down to explain each variant, it would have been helpful for those who haven’t watched that.
Memories by Nathan:
The project was simple but well themed. It uses p5.js and micro:bit. The microbit was in the fruit basket and it triggers the basket in the screen which is the brown rectangle. For the game, players have to get the fruit falling from the sky. It reminded me of a childhood game. So I guess the title refers to everyone’s memory. For suggestion, maybe he could have change the colored circles to actually fruit pictures. It is not hard to code for picture.
Shifting peace by Camila:
After seeing all her progress, I was really proud to see the final version. The projections and the rounded box both revealed the theme very well. Her theme was peace and the project was for herself. The videos are the peaceful places she found. The micro:it’s movement(x, y, z axises) triggers the video play. And the movement of the player triggers the video changes. I could have observed which places she likes and finds comfortable. For suggestion, since the project is designed for her, she could have make the micro:bit box to be something she likes if the one she has right now is not.
Ideation: Since we did the tutorial 3 in p5.js, I thought of doing few different pages by triggering the microbit.
For my mom: make different landscapes of Canada where she enjoyed.
For my self: as the very first project of IMA, I thought of mixing all the things I like.
For Johann Sebastian Bach: the IA project
I decided to go with the third one, the IA project.
Idea: The theme of this project is literally Bach and the period he lived, the baroque period. My inspiration developed from Bach: His music style is polyphonic and that inspired me to make a project with music. For secondary school, I was in Musique-Études program and I got to play Bach’s music for the first time and I found it very compelling. I thought polyphonic was just atonal at first, with Bach’s music, I realized that polyphonic can be very well harmonized and interesting. Before his music, I only listened to piano classic, but he opened my eyes to classic music.
For this project, I would like to explore the tonal polyphonic. In order to clearly listen to polyphonic, I will put the composition at the background (no changes) and make violin solos to get louder. So there is a starting page, and it changes to a ‘hall’ then by triggering the microbit, we can make the solos louder.
Baroque period: Baroque art (late 16th–18th century) is characterized by dramatic lighting, intense emotion, rich color, and dynamic movement. It often features grandeur, theatrical compositions, and strong contrasts between light and shadow (chiaroscuro). Baroque artists, such as Caravaggio, Rembrandt, and Rubens, aimed to evoke awe and engage the viewer emotionally, often using religious or mythological themes.
The title is “Shaken Melodies”. I like how we can refer that the conductor shakes the melodies. And Bach’s melodies also shakes my heart.
For the visual part, it a collage of baroque period music style. The period where Bach influenced a lot: The title spins. And the main interaction left to do is the art I will make when the collisions happen. I would like to add arrays and dots on the top of the musicians when the conductor touch them. For now, the conductor only moves side to side but the musicians don’t.
For the music, I have to full song playing at the back and the two groups: groups of 3 instruments. But it sounds too much so I will change the group into one solo instrument. And since the song is cut in 1 minute, I would have to make the volume goes down in order to make the viewers to think that it ends. I would have to see how to put the instruction as well. For now, the instruction is placed at the bottom of the canvas and it does not disappear. However, I am thinking to make a case for the microbit then write the instruction on microbit.
What to develop:
change how the page change: not with A bottom from microbit but the ‘shake’ trigger
change the music to solos
collision interaction
the ending
Progression of the week 13
I deleted the instruction “click A to start”, because I decided to write the instructions on the micro:bit case.
I added yellow-brown toned ellipses on the top of the canvas. They appear when a collision with the conductor occurs. These ellipses illustrates the idea that this artwork is alive and interacting. To do so, I tried to give the vibe of an old film. I also thought of making the ellipse in more saturated colors, but it seemed too much intense color presented.
Not yet finalized but I also have a line. In the video, the red-brown line appear when the conductor and violinists collapse (left side). I used the code where I made the arrays, however due to the opacity of the background or the line itself, I only see one single line. The code is here : https://editor.p5js.org/Seungbi/full/uSsKeJEW8. I would have to find a way to make the same line movement in my artwork.
I will display my project on the mac we use. I think it will be inconvenient to use the big screen since I would have to attach a headphone and a micro:bit. I personally think that more visual projects should use the bigger screen. But my has visual and audio part. As mentioned, my project require a headphone and a micro:bit, so it will be perfect to have a table.
Areas of Refinement/Updated Workplan:
make microbit case that has a baroque theme
write instruction on it
make B button function
in the function, add a reset or a last page
music: sometimes they all start on same time but sometimes doesn’t.
So I would need them to start on same time since the three melodies are supposed to overlap.
Also have to find how to end the song.
Lines on the top of the canvas
they must be a set of lines not a single line.
Progression of the week 14:
make microbit case that has a baroque theme
For the micro:bit case, I decided to use my ukelele. I placed the micro:bit on the ukelele and put a piece of paper on the micro:bit to hide the mechanism: to do so, I colored the paper to a similar color with the ukelele. Also tp differentiate the buttons, I drew a sqaure around the buttons: A is Blue and B is Red.
make B button function
in the function, add a reset or a last page
I added the a reset page which is same as the first page. So the viewers are supposed to click on B to reset the music and the page for the next ones.
music: sometimes they all start on same time but sometimes doesn’t.
So I would need them to start on same time since the three melodies are supposed to overlap.
I decided to just have one full song with all the instruments. Then I added to sound division effect to give more fun to the music.
Also have to find how to end the song.
The song I had initially was 7 minutes but because p5.js couldn’t handle a big file, I cut it into 2 minutes. And since no-one is going to be on my project for that long, I thought it would be fine to just cut the song.
Lines on the top of the canvas
they must be a set of lines not a single line.
I just change the code to have 5 lines for each group.
Final Presentation Self Evaluation:
Demonstration:
For the presentation, I connected the micro:bit to a bluetooth battery so that it can be wireless.
Like this
My project is called ” Shaken Melodies”. I used p5.js for coding and micro:bit and ukelele for the physical part of the project. I wanted to make a project for Bach and for myself. He is my favorite composer so it was my dream to make a project with his music.
Overall, everything worked and went well. The micro:bit connection was a little weak with the power bank but if I connected with the wire then change it to bluetooth, it worked well.
My project was unique because none of my classmates had a music theme. I think using the ukelele was creative (it is made by myself) but since I used the picture from the interact, it would have been more creative if I actually drew them.
My project work with micro:bit buttons: A and B. When click on A, the music and art start and when click on B, it ends and goes back to the initial page.
To create this project, I put most of my time into coding. I watches youtube videos and reference page of p5.js as a reference. I also used examples on p5.js for the micro:bit connection.
I succeeded on making a project designed for one which is holdable (wireless). The whole project theme was Bach and his period of time. Also the conductor presented at the center is the current conductor of OSM (orchestre symphonique montreal).
Except the paper used for hiding the micro:bit, I did not have any trash. The ukelele was always in my room. Consequently, I did not have any upcycling aspects.
My favorite aspect of the piece was the sound division. Initially, when the conductor moves, only the art generated on top was the triggered part, but the sound division added to that part and it gave more distinction between the group. So when it goes to violin, the viewers would hear the music from the left ear and when it goes to cello, the sound would go to the right.
Coding in overall was a challenge but the most difficult and that took time was changing pages. It may seem very simple but since I had many picture included in a page, I had to adjust the opacity of each picture to show to trace of the conductor, the sparkling on the top, and the trace of the generated art.
As I already mentioned, if I had more time, I would have drown the pictures I used. I thus learned to manage my time and to follow to workplan.
The physical aesthetic tells that they put lots of time in the project. The base box, the tree and the hanging origami were perfectly done. Also the code was well done: when press the pressure sensor, the colour changes. I think it would have been nice if the change of lights was slower.
The Neopixel Christmas Tree by Nathane
This project was more like a prototype than a project. It did not contain any interaction or change of light. Also for the aesthetic part, he could have colored or covered the Tim Hortons’ cup.
Weeping palm by Emma and Ray
I reallt liked the colours and texture they used: the shinny clear plastic paper and the light green paper. As we can presume from the title, the tree is weeping. Also the hanging lights was compelling because most of us used the neopixels. For the interaction part, when the pressure sensor detects pressure, the lights stopped twinkling and just lighted up.
Rocket by Emmanuel and Kwan
Their paper craft was innovative, it did not look like a rocket rather a skyscraper. But I guess the cotton at the bottom is supposed to present the gaz. When the pressure sensor was triggered, the change of lights got slower. I think the colour of lights could have been a rocket colour like white, blue and red.
Nelly the Jelly by Emma
When the pressure sensor was pressed, the lights were on and changing rapidly. The craft really looked like a jellyfish. It also seemed like a futuristic party room in the roof. I wonder how the lights are placed in it. It would have been more nice if she added some hanging lights at the bottom as well.
Chameleon by Jiachen and Shabnam
The colour change of the chameleon was triggered by pressure sensor. We could’nt experience the shake part of the interaction because we did not know what to shake. It would have been better if they added some drawings on the chameleon like eyes or tabby.
Doris the addict by Lanna and Sophia
This project was my favorite. They really used the landscape well. When the sensor was triggered, the light was moving right to left. They succeed on our time’s challenges: hiding the strip well and make a gradually changing lights.
Naby the Butterfly by Dyna and Angie
This project has a well defined theme: they named the pressure sensor an antenna what butterflies have. I also liked how they used colored paper, since most of us used white paper. The interaction was fun because it felt like the butterfly was sensing us then changing colour. The colours were also well picked: white and yellow.
Ideation phase 1- The LEDs would be placed in a spiral along an imaginary sphere. When triggered, a streak of light would go through it. There would also be a paper structure inside the “sphere” and the LEDs would illuminate it. 2- A pentagram with LEDs along each line and each line would be covered with an interesting paper. 3- A heart made out of black paper. There would be small cracks in the heart to let the light through. The LEDs inside would beat.
(we forgot to take pictures…)
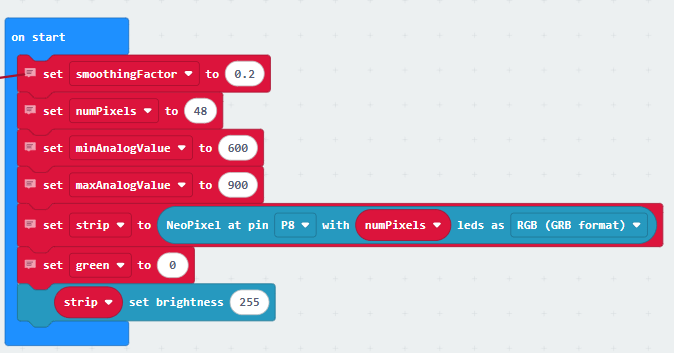
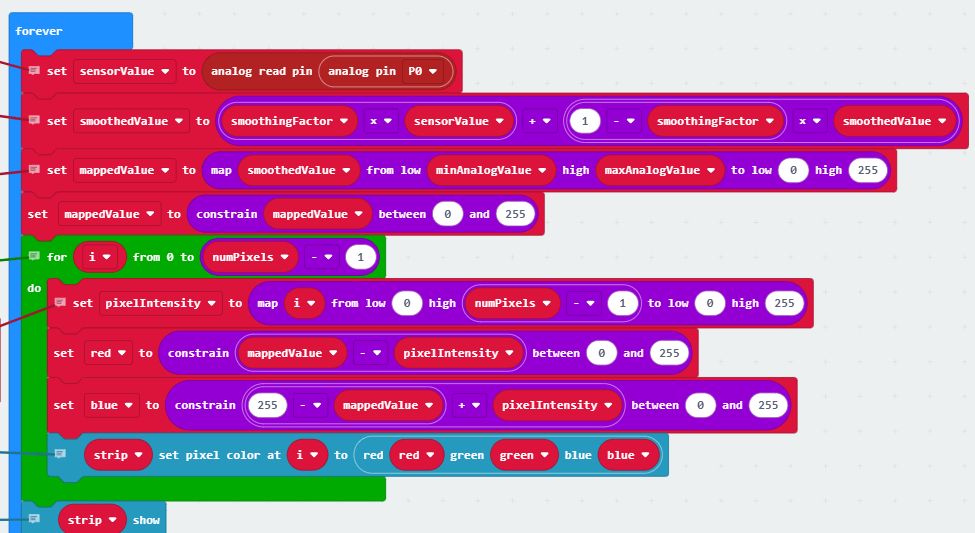
The code:
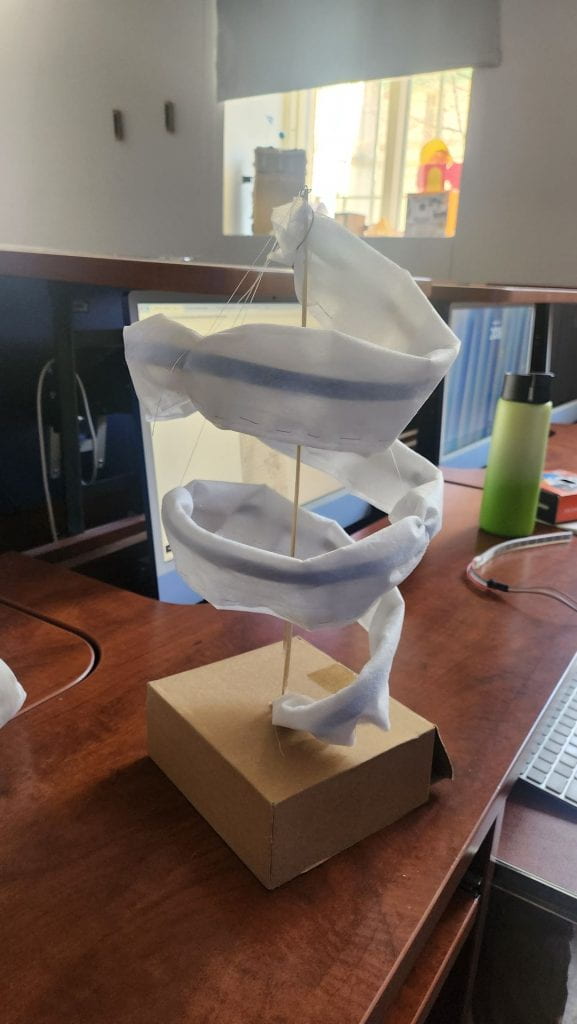
Title of the work: Spiralling colors
List of materials used: Fabric, LEDs, metal wire, string, cardboard, pressure sensor, wooden stick
Recap initial idea and inspirations: We wanted to make something with a spiral and we were inspired by the code the teacher posted.
Describe: Building the object wasn’t too hard and it was kinda fun.
How creative or unique is your piece?: It has a unique shape.
How functional is your piece? It fully functional.
How much effort did you put into coding? A lot because nothing was working at first and we did a lot of trial and error.
How aesthetically successful is your piece? The colors are nice but the sowing could be visually better.
How well constructed is you piece? We think that with the time and resources we had its good.
Your favorite aspect of the piece and why it works well for you. We really like the colors and how the LED changes over time
What hurdles did you overcome and how? The coding was really annoying.
Suggestions for improvement and how you would implement them. We would give it a nicer base.
Key learnings from the creative process. We learned how to use LEDs
Number of hours spent working on each components 8h30
This project has a really well made craft. I was really surprised by the bird’s face. Unfortunately when we went to try it, the micro:bit was disconnected. I assume that when we shine the light, the bird’s going to turn its head. It would have been really amusing and scary.
The flying dragon by Binh
Binh’s idea of making the dragon was compelling, but it wasn’t working. If she put more time on it and add more decoration so it seems more like a dragon, that would have been perfect.
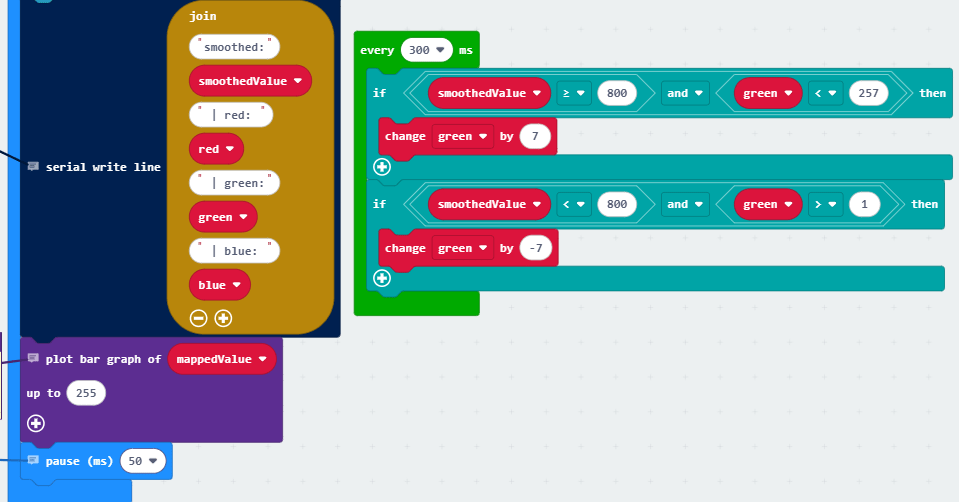
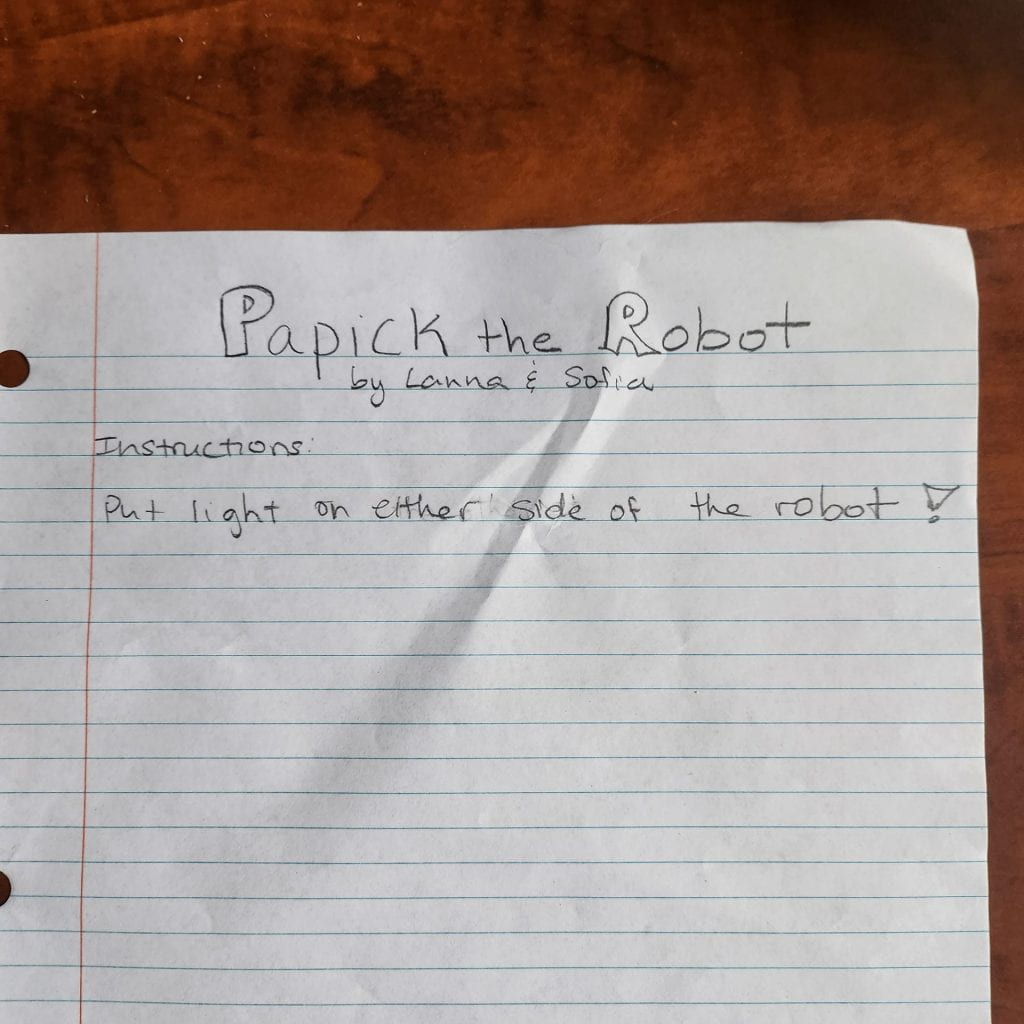
Papick the Robot by Lanna and Sofia
This project was my favorite. I like how their tensegrity is tall and has a detailed shape. For the interactivity, when you shine either side the robot would turn that way. Although they wanted to make this robot to go straight line, I really like how the robot was making circle.
ISI by Emmanuel and Kwan
This project was funny how the tensegrity seems like it would fall because it is spinning so fast, but it never did. They glued it really well. I can tell their effort. While the presentation, they said their original idea was a fen, and I think it will be really great to make a fen with micro:bit. Overall, I think this project was very well done and has good potential.
Unfortunately, I couldn’t see 5 projects because some were unfinished or not working.
Make a cylinder tensegrity with colourful tissue paper at the edge of each bar. We would need a DC motor to spin the tensegrity, then the tissue paper would make an colourful circle.
A tensegrity in a torus form that spins. With two photocells, we can change directions. And the speed changes according to the light level.
Project Idea:
Our project, IMA student trap, is a tensegrity dome that flattens with the help of a servo motor. There is string that connects the middle of the dome to the motor so when the motor turns. it pulls down the dome, which is held with elastics so it is flexible enough to become flat. When the motor stops pulling, the tension from the elastics pulls the structure back into a dome shape.
Materials and Supplies Needed:
Wood, cardboard box to put on the tensegrity dome, hot glue, elastics, micor:bit, 90 degree servo motor, wires and photocell.
Process:
Code for the servo motor:
When the photocell (p1) is touches, the servo motor goes to 180, which makes the tensegrity to go down.
Here’s how the servo motor works.
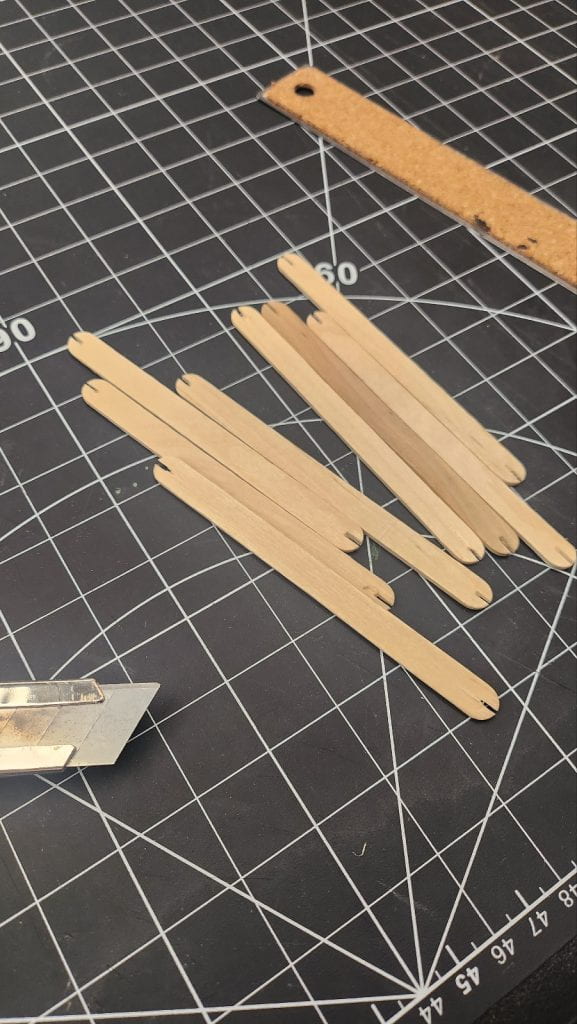
For the physical craft part:
We firstly made small space on each end of the wood sticks to put the elastic.
We placed the wood, then connect them with hot glue from the center.
Here’s how the tensegrity works: although we deform it, it resist and go back to its form.
After connecting the tensegrity with string, through in the hole at the center of the box, we tied knot to servo motor.
Final result:
As you can expect from the title, it is a trap. When you put your finger on the light sensor, the sensor won’t get any light then the servo motor will be activated and the tensegrity will go down.
Self evaluation
Title of the work, list of materials used, recap initial idea and inspirations
Title: IMA student trap. We used cardboard box, elastics, wood, string and metal wires. We wanted a tensegrity that moves and with a more circular shape.
How creative or unique is your piece?
It’s unique because in our project, we play with the tension of the tensegrity instead of it just being passive.
How functional is your piece?
It functions as intended, except for the fact that the size of the motor limits the range of motion.
How much effort did you put into coding?
We didn’t have to do much as the code was quite simple.
How aesthetically successful is your piece?
We put a lot of effort on the tensegrity and we are happy about our structure as it is more complex. However, we didn’t get to work on making it look nice overall I think that’s fine.
How well constructed is you piece?
Our tensegrity is well done and the rest of our project looks basic so there is no problem with that.
Your favorite aspect of the piece and why it works well for you.
Our favourite part is the tensegrity because it is complex and it can move.
What hurdles did you overcome and how?
We were worried about if we could find elastics that were the right size but in the end we found some. Making the structure took a long time so we needed patience for that.
Suggestions for improvement and how you would implement them.
We would use a motor with bigger range so that our tensegrity can go fully up and fully down because now it’s movement range is limited.
Key learnings from the creative process.
We learned how tensegrity, which is more of a science concept, cna be used in art.